The RV remodel ideas that change a rig the most can be the simplest: replace tired furniture with pieces built for the space. Below are 10 real before-and-after installs from our Lancaster, PA shop, from swivel recliners to theater seats and sleeper sofas, each with where it works, what it takes and where to see the options.
Key takeaways
- Every photo below is a real Open Road Interiors install or our own showroom floor.
- Measure first: width, depth, anything behind the furniture, and whether it sits on a flush or raised slide-out.
- Furniture goes in last, after repairs, paint and flooring.
- On our product pages, theater seats run 56″ to 78″ wide, sleeper sofas 50″ to 80″ and recliners 25″ to 42″. Several models also come in a narrow-arm version that is 4″ narrower.
- On orders of $1,000 or more: free delivery to the lower 48, or free installation at our Lancaster shop with removal and disposal of your old furniture.
1. Swap worn rockers for two swivel wallhugger recliners


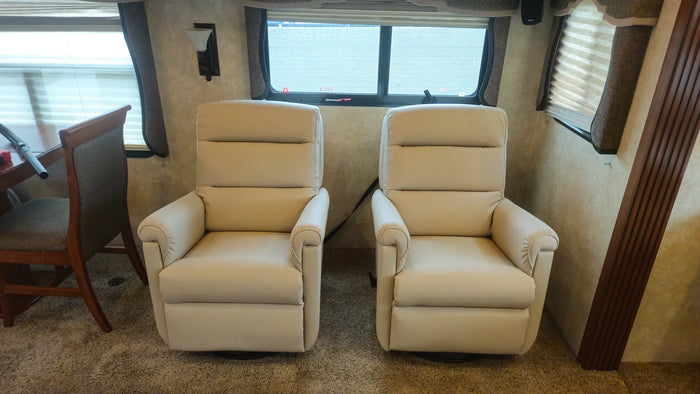
The old rockers were dark, bulky and peeling. The owners kept the layout and switched to two Lil' Manhattan swivel wallhugger recliners in Coffee Cream Ultraleather. Going from black to cream makes the corner read brighter with the same blinds and carpet. With a wallhugger under a window, plan the recline around the wall behind it and the walkway in front. For more ways to update the seating in an older coach, see our old RV remodel ideas.
Works best in: a pair of chairs under a window, or rigs where old recliners crowd the walkway.
What it takes: Measure the wall and the room in front for the footrest. The Lil' Manhattan is 28″ wide, with swivel as an option and a rocker version available. See our single recliners (25″ to 42″ wide).
2. Trade the sectional for a straight hide-a-bed


In a slide-out, the chaise end of a sectional can stick into the path to the door or galley. Here the worn sectional came out and a straight RV Harrison hide-a-bed went in. Same wall, open floor, and still a bed for guests.
Works best in: slide-outs where a corner piece blocks the walkway.
What it takes: Clear floor in front for the bed to unfold. The RV Harrison Hide-a-Bed comes 70″ wide (34″ deep, 35″ high) or as a 76″ queen, with an air mattress upgrade available. Browse our sofa sleepers.
3. Turn a curved sofa into two theater seats


If two of you travel and both like your feet up, a sofa may not be the best use of the wall. This owner swapped a cream sofa with a rounded end for an Encore theater seat: two recliners, a center console and cupholders in the arms. The end that crowded the galley is gone, and each person gets a seat.
Works best in: couples who travel as two, and the wall facing the TV.
What it takes: Encore theater seats come with a 12″ console (67″ narrow arm or 71″ wide) or a 14″ console (69″ narrow arm or 73″). Electric controls are standard, so plan for power; head tilt and USB-C charging are options. Compare our theater seats.
4. Give the other wall a sleeper in the same color


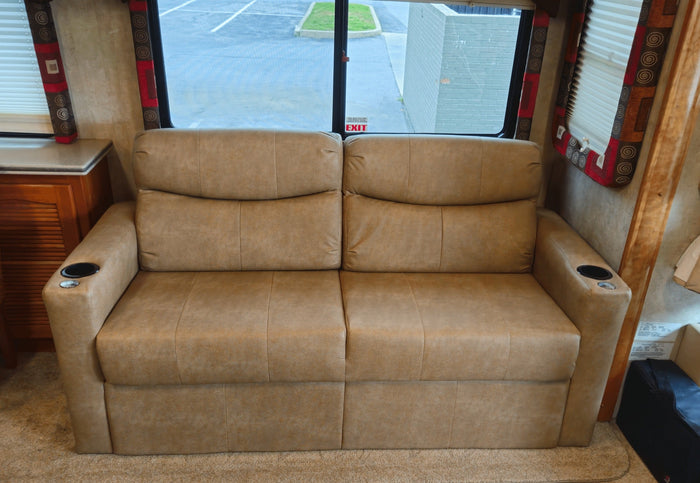
Same motorhome as idea 3, other wall. The tan fabric sofa came out and an Encore Ultra Sleeper went in, in the same Saddle Ultraleather as the theater seat. One upholstery and color on both walls makes the living area read as one room. Replacing one piece now? Write down the color so the second one matches later.
Works best in: living areas with two seating walls, or remodels done in stages.
What it takes: The Encore Ultra Sleeper comes 71″ wide, or 67″ in the narrow-arm version (no cupholders in the arms). Our floor model measures about 34″ deep. See the 71″ Encore Ultra Sleeper.
5. Keep the layout, add a console and swing-out tables


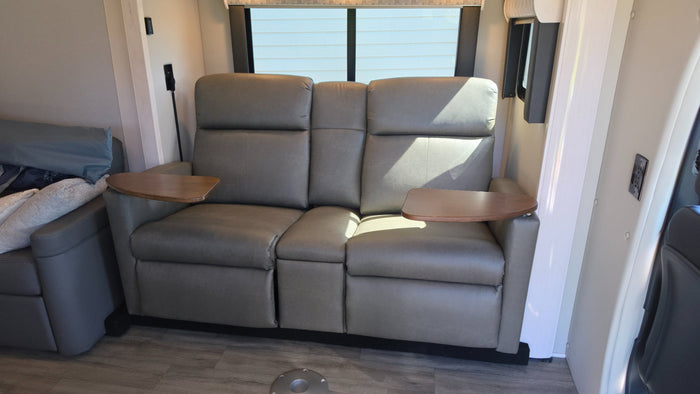
A remodel does not have to change the color. In this motorhome the old seat was gray, and so is the new 67″ Venture theater seat. What changed is what it does: a fold-down center console and a wood table on each arm that swings in for a plate, laptop or coffee and out of the way when you stand.
Works best in: rigs where the color already works, and anyone who eats or works from the sofa.
What it takes: Versa side tables on the arms are an option on our Venture theater seats. The narrow-arm 67″ Venture is 4″ narrower than the standard arm, with no cupholders in the arms. Compare theater seats and their table options.
6. Go from overstuffed to tailored


Same dark brown, very different look. The old loveseat had puffy pillow-top cushions that filled the window wall. The Venture theater seat that replaced it has tailored backs, a console with cupholders and a wood table on each end. With dark wood blinds, staying deep kept the room together; the cleaner shape does the updating.
Works best in: rigs with dark wood trim, where a light color would fight the cabinets.
What it takes: Venture theater seats come with a 12″ console (67″ or 71″) or a 14″ console (69″ or 73″). Electric controls are standard; a 41″ highback is optional. See Venture and other theater seats.
7. Hide a real bed in the sofa


On the other wall of the same rig as idea 6, a leather sofa with heavy contrast stitching gave way to a Lux hide-a-bed in the same Coffee Bean Ultraleather. A hide-a-bed keeps a mattress folded under the seat: a sofa by day, a bed when the grandkids come along.
Works best in: rigs where the sofa is the only spare bed.
What it takes: Lux hide-a-beds come 68″ and 72″ wide, plus queen versions at 74″ and 78″. Measure the floor in front for the open bed, and your entry door. Browse hide-a-beds and other sleepers.
8. Refresh the jackknife behind the cab


In smaller motorhomes the sofa can sit right behind the cab, where it gets used every day. This one had a fabric seat and a leather-look back worn through at the arm. The new E-Z Sleeper jackknife in light gray Shield Ultraleather has padded cupholder arms, and the lighter color brightens the narrow aisle. A jackknife folds flat into a bed.
Works best in: compact motorhomes and narrow living areas.
What it takes: The E-Z Sleeper Jackknife with drawer comes 52″, 62″, 68″ and 72″ wide. On a raised slide, a custom slide-floor notch-out is available (the drawer is left off if the notch-out is over 4″ high, and we need the exact slide floor measurements). See the 72″ E-Z Sleeper Jackknife.
9. Retire the peeling sofa


When a seat starts to peel and flake, a throw blanket only hides it for so long. Our camper furniture ideas put failing seats first on the list of what to replace. This cream sofa beside the dinette had flaked across both cushions. The replacement is a three-seat sofa in warm tan with cupholder arms. A tip from RV Inspiration's remodel guide: when the old piece comes out, check the floor behind it for soft spots, a sign of water damage that is easier to fix now.
Works best in: any rig where the factory upholstery is peeling, cracking or fading.
What it takes: Choose the upholstery: Ultraleather, Premium Fabric or Italian Cowhide Leather, with 100+ colors between them. See upholstery types and colors.
10. Fill a long wall with a three-seat sofa and side tables

Long slide-outs can take a three-seat sofa, and tables at both ends make it earn the space. This one runs the length of the slide with a swing-out wood table at each arm. We heard the same wish from a customer this fall: a motorhome owner wanted three reclining seats and a table on each side, because there was nowhere to set anything down. We pointed to our 88″ Houston Wallhugger Sofa, where a reclining center section is an option.
Works best in: larger motorhomes and fifth wheels with a long slide-out wall.
What it takes: Our reclining sofas run 72″ to 100″. Check which seats recline on each product page, and measure the full wall, not just the old sofa. See our RV sofas.
The 10 ideas at a glance
| # | What came out | What went in | Works best in |
|---|---|---|---|
| 1 | Two worn rocker recliners | Two Lil' Manhattan swivel wallhugger recliners | A pair of chairs under a window |
| 2 | L-shaped sectional | RV Harrison Hide-a-Bed | Slide-outs where a corner piece blocks the walkway |
| 3 | Sofa with a curved end | Encore theater seat | Two travelers facing the TV |
| 4 | Fabric three-cushion sofa | Encore Ultra Sleeper in the same color as idea 3 | Two seating walls, remodels in stages |
| 5 | Gray reclining loveseat | 67″ Venture theater seat with console and swing-out tables | Rigs where the color already works |
| 6 | Pillow-top reclining loveseat | Venture theater seat | Dark wood trim |
| 7 | Leather sofa with contrast stitching | Lux Hide-a-Bed | Rigs where the sofa is the spare bed |
| 8 | Worn sofa behind the cab | E-Z Sleeper jackknife | Compact motorhomes |
| 9 | Peeling two-seat sofa | Three-seat sofa with cupholder arms | Peeling or cracking factory upholstery |
| 10 | (after photo only) | Three-seat sofa with swing-out tables | A long slide-out wall |
What a furniture swap really takes

Every idea above came down to four steps.
- Measure the space and the way in. The area, anything behind it, and the entry door. The narrowest point decides what fits.
- Know your slide-out. A flush slide sits level with the floor; a raised slide stays a step up, and we need the height of that step.
- Mind the weight. Cargo carrying capacity (CCC) is the GVWR minus the unloaded vehicle weight, and it is set by weight, not by space. RV Inspiration's remodel ideas guide also warns against overloading a slide-out with heavy furniture.
- Secure it properly. When your furniture arrives, our installation team secures it into your rig. Under some slide floors there are metal plates or rollers, so brackets may need a different approach.
At our Lancaster shop, installation is free on orders of $1,000 or more and includes white-glove removal and disposal of your old furniture. Our team says a swap at the shop takes about one to three hours. Prefer to do it yourself? We ship free to the lower 48 on the same orders. Details are on our Shipping page.
Beyond the furniture: 4 updates worth doing first
We stick to furniture and upholstery, but these updates come up in the remodel guides we read. Do them before the new furniture arrives.
- Fix what you find. Soft floor spots and ripples in RV wallpaper can be signs of water damage, according to RV Inspiration.
- Paint walls and cabinets. RV Inspiration's painting guide covers cleaning, scuffing laminate and a bonding primer, and its remodel guide says to let paint cure at least a week before furniture goes back. Extra Space Storage suggests light neutrals such as white, gray, beige, sage or pale blue to brighten a small space.
- Update window treatments. Trading heavy valances for roller shades or sheer curtains lets in more daylight.
- Change the lighting. New fixtures and LED bulbs in place of old box lights change the feel of the room. RV.com's before-and-after roundup shows how much better lighting and brighter colors do for a remodel.
For the order to do the work in, see our RV remodel guide. For more layout ideas, see our posts on cozy RV living areas and RV space-saving solutions.
More you could put in: from our showroom floor
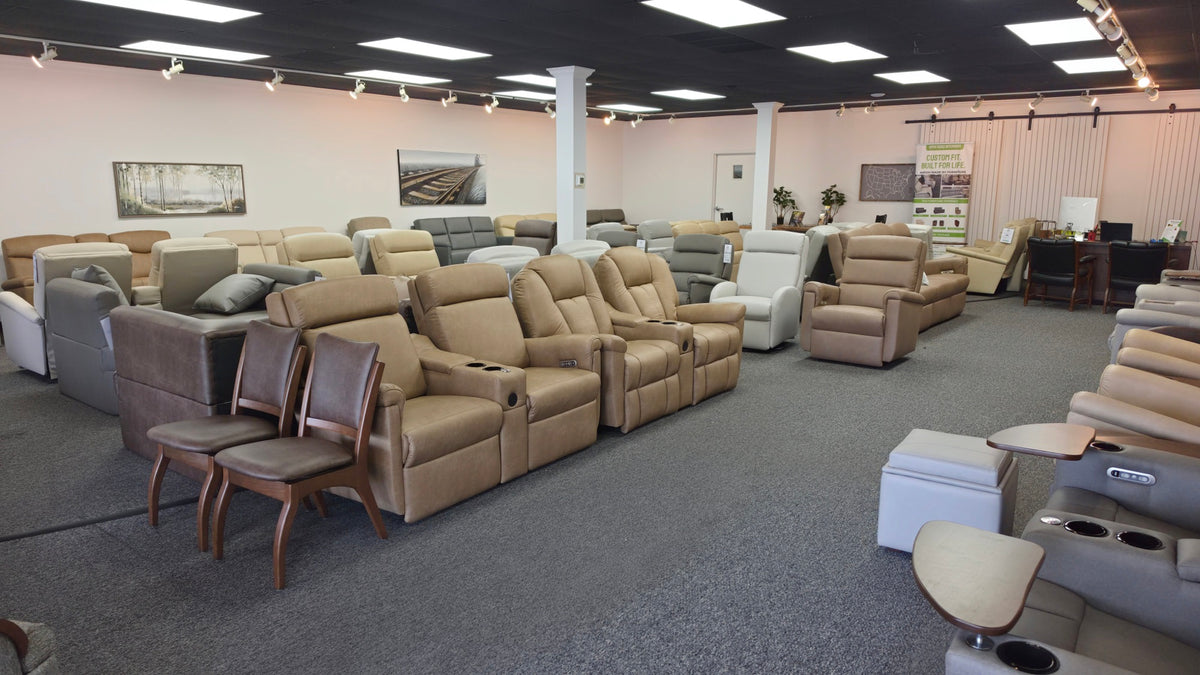
These aren't installs, so they don't count in the 10. They're pieces and details on our showroom floor in Lancaster that you can sit in, open and test before you decide.


Our showroom is at 2460 Lincoln Highway, Suite 504, Lancaster, PA, open Monday to Saturday, 10am to 5pm, with no appointment needed. If you can't come in, send us your measurements and a photo of the space. You can see more real installs on our Before and After page.
Pieces like the ones in these remodels
 71″ Encore Zerowall Theater Seat (12″ Console)
 68″ Lux Hide-a-Bed Sofa
 72″ E-Z Sleeper Jackknife w/ Drawer
 88″ Houston Wallhugger Sofa
Frequently asked questions
Where should an RV remodel start?
Start with anything structural or wet: leaks, soft floors, damaged walls. Then paint, flooring and fixtures. Furniture goes in near the end, so it isn't in the way and doesn't get paint on it. Our RV remodel guide walks through the full order.
Is renovating an RV worth it?
It depends on your rig's condition and how long you'll keep it. If the structure is sound and you like the floor plan, new furniture is a change you'll notice every day.
How do you remove an RV couch?
RV sofas and recliners are secured to the floor, and Good Sam's flooring guide says the furniture can typically be removed by taking out a couple of bolts or screws. Power pieces also have wiring to disconnect. When we install at our shop, removal and disposal of the old furniture is included.
How much does an RV remodel cost?
It depends on how much you change. For furniture, every product page on our site shows its starting price, and we can quote a full plan once we have your measurements.
Can I replace RV furniture myself?
Yes. We ship free to the lower 48 on orders of $1,000 or more. The tricky parts are raised slide-outs, wiring for power recliners and getting large pieces through the door, so measure carefully or call us first.
How do I measure for new RV furniture?
Use the list in the showroom box above, add your entry door, and send it to us with a photo. We'll help you check what fits.
Sources
- RV Inspiration, "Must-See RV Remodel Ideas: 22 Ways to Upgrade Your RV" (window treatments, lighting, furniture weight on a slide-out)
- RV Inspiration, "How to Remodel an RV: DIY Guide for RV Owners" (order of work, water damage signs, paint cure time)
- RV Inspiration, "A Complete Guide to Painting RV Interior Walls & Cabinets" (scuffing laminate, bonding primer)
- Extra Space Storage, "Remodel Your RV with These 21 Makeover Ideas" (paint colors, fixtures and LED bulbs)
- Good Sam Camping Blog, "How to Install New Floors in Your RV" (removing RV furniture)
- Coachmen RV, floorplan specification definitions (GVWR, unloaded vehicle weight, cargo carrying capacity)
- RV.com, "15 Before-and-After Photos of Stunning RV Remodels" (lighting and color)
- Open Road Interiors: Before and After, RV Furniture That Lasts, Shipping and Upholstery pages (November 2026)
- Product pages on openroadinteriors.com (as listed in November 2026)
How we made this guide: we went through every before-and-after photo on our site and counted only the scenes taken inside a customer's RV, which gave us 10 ideas; showroom photos are shown separately and not counted. Sizes and options come from our product pages, the measuring list and install details come from our team's answers to customers this fall, and the updates beyond furniture come from the remodel guides listed above.
Visit us
Come sit on it before you buy
Visit our Lancaster, PA showroom at 2460 Lincoln Highway, Suite 504. Open Monday to Saturday, 10 to 5, no appointment needed.