RV Remodel Guide: Where to Start and Where Furniture Fits
 By Michael King, Owner

Start an RV remodel with what you can't see: find and fix leaks and soft floors first. Then take the old furniture out, do the floors, walls and paint, and bring the new furniture in last so it isn't scuffed, dusted or painted around. Measure the finished space and the door before you order. The seating is the part you'll feel every day.
Key takeaways
- Work from the shell inward: leaks and soft spots first, then floors, walls and paint, and furniture last.
- Take the old furniture out before new flooring goes down. Factory floors often run under it.
- Before you pull out a sofa, check four things: hidden seat belts, your slide-out's weight guidance, what's under the floor and the way out the door.
- Measure the finished room, the slide-floor lip and the door. Our jackknife sofas, Ultra Sleepers and Easy Beds can be ordered with a custom notch-out for a raised slide floor.
- Our seating comes in three upholstery types (Ultraleather, Premium Fabric and Italian Cowhide Leather) with more than 100 colors between them.
Where do you start an RV remodel?
Ideas lists are fun, and we have one with our own before-and-after photos. But the order you do the work in decides whether the remodel holds up. Get it wrong and you end up pulling up a new floor to fix a leak, or painting around a sofa you're about to replace. Here's the sequence that remodel guides and repair shops agree on, and where furniture fits into it.
1. Inspect the rig and write a plan
RV Inspiration's remodel guide starts here: before you begin, assess the condition of the RV, have it inspected if it's new to you, check the roof for leaks and look for signs of water damage in the walls and floor. Then write down how you actually use the rig. How many people sit at once? Who sleeps where when the grandkids come? Do you eat at the dinette or work there? That list is what decides the furniture later, so it's worth making now.
2. Fix water damage and structure first
Water is the one problem a remodel can hide instead of fix. OCRV Center's repair guide gives the order: trace the water's path, stop where it gets in, dry the core and check that it's really dry, replace damaged structure, then close the panels and install finishes last. It calls new flooring over a core that hasn't been checked dry "the most expensive shortcut" in RV repair, because the second repair includes tearing out the first.
3. Take the old furniture out
Good Sam's flooring guide notes that factory RV floors are often installed before the cabinets, furniture and even the walls. The same guide says the furniture can typically be removed with a couple of bolts or screws, while the floor under the cabinets can often stay. MountainModernLife had to take their sofa out before they could start on the flooring, and found it had to be partly taken apart to fit through the door. So if a sofa, dinette or recliner is staying, plan to remove it and put it back. If it's being replaced, this is the moment it leaves.
4. Floors, walls, paint and lighting
This is the messy middle: flooring, wall coverings or paint, window treatments, lighting, counters and fixtures. RV Inspiration's timeline adds one step here that people skip: let the paint cure before you bring furniture in and scuff it, at least a week.
5. Measure the finished room
Measure after the new floor is down, not before. Width of the wall, depth from the wall to the walkway, height under the window, the lip where a slide-out floor meets the main floor, and the narrowest point on the way in (often the entry door). Our own site puts it this way: every RV has different clearances, slide configurations and weight limits, so we look at your floor plan and confirm the configuration that works before anything is ordered.
6. Furniture and upholstery go in last
New seating goes in when the dust is gone and the paint has cured. It's the last step, but it's the one you'll notice every evening: where you sit to read, how the sofa sleeps a guest, whether you can see the TV without twisting. That's why we think it deserves as much planning as the floor.
| Step | Why it comes here | Source |
|---|---|---|
| 1. Inspect and plan | Roof leaks and water damage change the whole scope | RV Inspiration |
| 2. Water and structure | Finishes over a wet core get torn out again | OCRV Center |
| 3. Old furniture out | Factory floors often run under it | Good Sam, MountainModernLife |
| 4. Floors, walls, paint | Paint needs to cure before furniture comes back | RV Inspiration |
| 5. Measure | New floors and slide lips change the numbers | Open Road Interiors |
| 6. Furniture last | No scuffs, dust or paint on new upholstery | RV Inspiration |


Four checks before you pull out a sofa or dinette
These come up again and again in RV owner forums, and they're easy to miss when you're thinking about colors.
- Hidden seat belts. In motorhomes, sofas and dinettes can have seat belts tucked behind or under the cushions. A member of The RV Forum points out that when there are belts, the seat counts as a real seat for travel, so removing it is worth thinking through. If yours has belts, ask your RV maker how a change affects your travel seating before you order.
- Slide-out weight. One owner on a brand owners' forum quoted their manual: "Do not place excessive weight in the slideout room." What counts as excessive differs by rig. Another owner says their factory gave them a limit for the furniture in that slide on their unit. Your owner's manual or the maker's support line has the answer for yours.
- What's under the floor. Slide-out floors can have metal plates or roller systems running under them, which changes where and how a piece can be screwed down. We check this on installs.
- The way in and out. Old RV furniture can come out in pieces: forum members describe recliner backs that come off and sofas that had to be stood on end and turned to clear the door. Measure the door and any tight turn inside for the new pieces too.
RV remodel ideas by area, and where furniture fits
Here's each part of the rig with the questions to ask, what we can offer for it and where to find more ideas. Every size below comes from our product pages.
Living area: seating you'll actually sit in
The living area is where you spend your evenings, so it's where an uncomfortable factory sofa shows up first. One iRV2 member wanted to replace an L-shaped couch because the person on the couch had to turn their head and neck to see the TV. Another replied: "Comfortable seating is as important as comfortable sleeping." Start with how you face the TV and where drinks, remotes and a laptop go. Then pick the seating type.
- Theater seats put two or more reclining seats side by side, with a center console on some models. Ours run 56″ to 78″ wide.
- Reclining sofas run 72″ to 100″; reclining loveseats 48″ to 64″.
- Single recliners run 25″ to 42″, with swivel and rocker versions on some models.
- Against a slide wall or under a window, check how much space the recline needs behind the seat. Our recliner range includes Wallhugger and Zerowall models for those spots.
Browse our theater seats, RV sofas and single recliners, or see more layouts in our post on cozy RV living areas.
Sleeping space for guests
If the sofa has to become a bed, decide how often and for whom before you look at styles. A jackknife folds flat in one motion; a hide-a-bed has a mattress that pulls out; our Ultra Sleeper is a tri-fold design. On our product pages, jackknife sofas run 52″ to 80″, hide-a-beds 67″ to 78″ (several in queen size) and Ultra Sleepers 50″ to 71″. One owner came to us this fall wanting to take out a Murphy bed and put in a sofa bed instead. That kind of swap gives the room back during the day and still sleeps a guest.
See all our sofa sleepers.
The dinette
The dinette booth is a big piece of floor space for something you may use twice a day. People write to us wanting to swap the booth for a table and chairs, or to replace a dinette in a slide-out with a loveseat and swing-out tables. Before you decide, think about where you'll eat, where you'll work, and whether the booth is also a bed you'll miss. If you keep a dinette, our dinette sets come in 42″ and 48″ bench depths, like the 42″ Classic Dinette Set, and our Dutch Swivel Diner chair turns 360°.
Slide-outs
A slide-out is often where the sofa or dinette lives, and it brings its own rules. If your slide floor sits higher than the main floor, a sofa that spans both has to clear that lip. Our jackknife sofas, Ultra Sleepers and Easy Beds can be ordered with a custom slide-floor notch-out. On the jackknife sofas, the drawer is left off if the notch is more than 4″ high, and we need the exact slide floor measurements. Keep the slide's weight guidance in mind (see the checks above), and keep the floor clear before you bring the room in. Winnebago's slide-out care guide warns that items and debris left on the floor can damage the flooring when the slide retracts.
Older RVs and gutted remodels
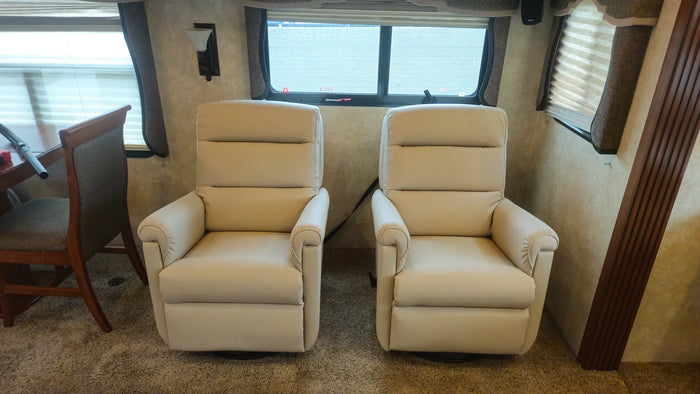
In an older rig, worn upholstery can date the whole interior. The photo above is a good example: two recliners whose dark covering had peeled away down to the backing. Our old RV remodel ideas for the living area start with seats like these. If you're stripping an older RV back to the walls, it's the easiest moment to rethink the layout from scratch, because nothing has to go back where it was. Our RV and camper furniture ideas suggest what to replace first.
Small RVs and campers
In a small rig every inch counts twice. Two things in our catalog are built for that. Narrow-arm versions of several of our seats are 4″ narrower than the standard arm, with no cupholders in the arms. And our Smart Cabinets are 6″ to 16″ wide, with cup holders in the top, a hinged top for remotes and drawers, made to sit beside a sofa or chair where there's no room for an end table. More ideas in our post on RV space-saving solutions and the Smart Cabinets collection.
Upholstery and color
Upholstery is where a remodel's look comes together, and it's also what takes the wear. Our seating comes in three upholstery types: Ultraleather, Premium Fabric and, on all but two recliner models, Italian Cowhide Leather, with more than 100 colors between them. You can browse the swatches on our Upholstery page, which shows our standard fabrics and several Ultraleather lines (Brisa, Brisa Distressed, Tottori, Wired and Original). Colors look different under RV lighting, so it helps to see a sample in your own rig. When a customer this fall was matching a light interior, Nic, our store manager, mailed light Ultraleather samples to try in the space.
Thinking of recovering what you have instead? A member of The RV Forum who planned to reupholster their sofa found it "a much bigger job than I expected." Weigh both paths before you decide.
Floors, walls, paint and lighting
These are the projects that change how the rig looks when you walk in, and there are good step-by-step guides for each. Good Sam's flooring guide, for example, says you can lay the new floor right over old linoleum when it's level and in good shape. That's not our trade, so we'll leave the how-to to the specialists and repeat the one rule that matters for furniture: do this work before the new pieces come in.
Before and after: real installs from our shop
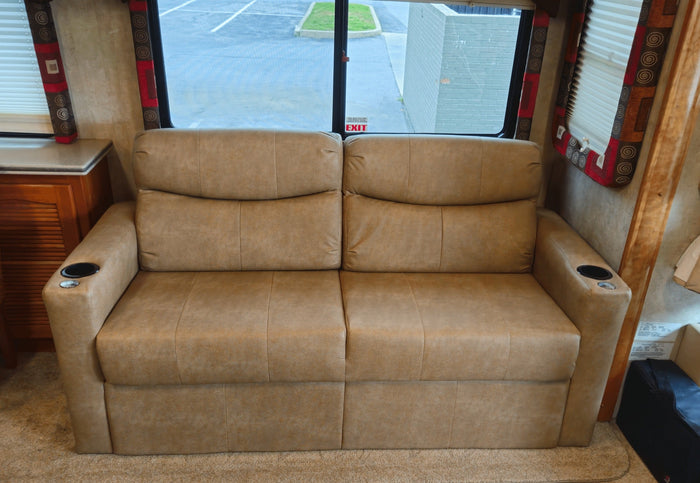
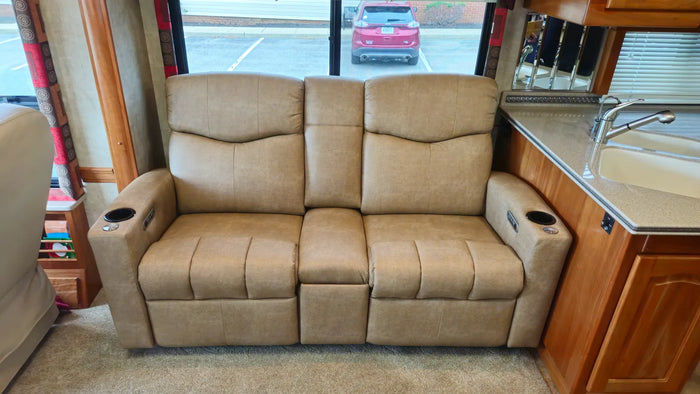
All of these are our own customers' rigs, photographed before and after we installed new furniture. You can see every one on our Before and After page, and ten of them, with what changed in each, in 10 RV Remodel Ideas: Real Before and After Photos.


What Open Road Interiors does in a remodel
Our part of a remodel is the furniture: the sofas, recliners, theater seats, sleepers, dinettes and small cabinets you sit on, sleep on and live around. Here's how it works.
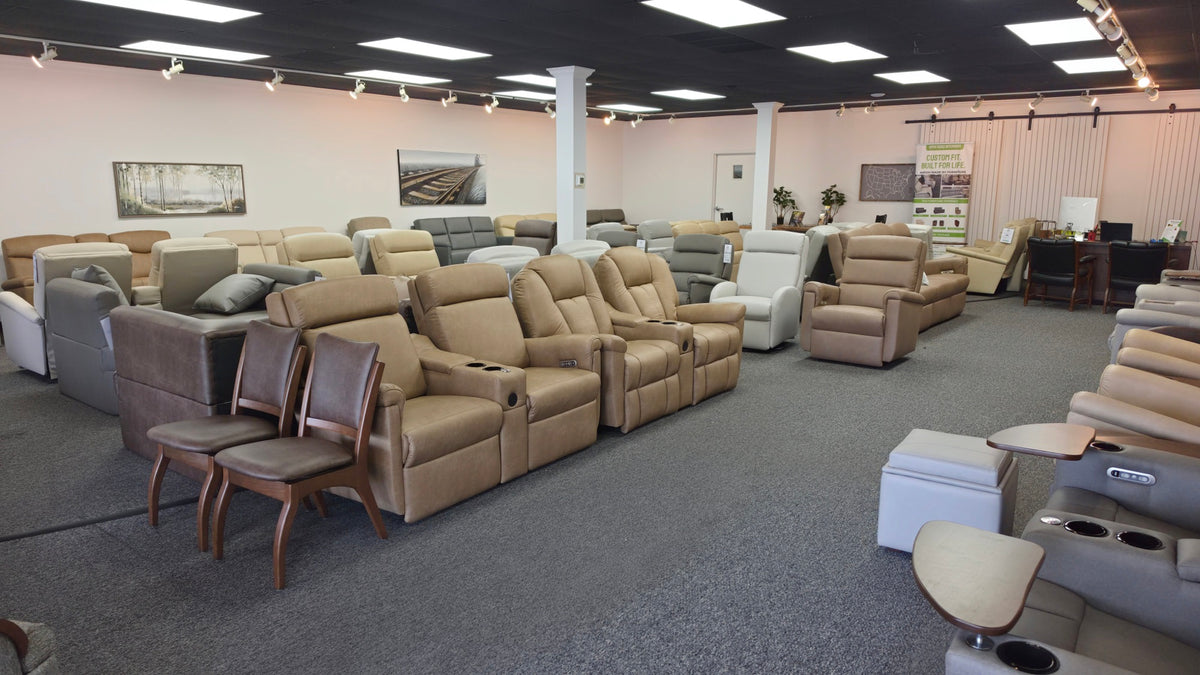
- Come sit in it. Our showroom at 2460 Lincoln Highway, Suite 504, Lancaster, PA is open Monday to Saturday, 10am to 5pm, no appointment needed. Comfort is personal, and sitting in a piece tells you more than any photo.
- We plan for your exact rig. We look at your floor plan and confirm the configuration that works before anything is ordered. If you can't visit, send us your measurements and photos of the space.
- Choose the upholstery. Ultraleather, Premium Fabric or Italian Cowhide Leather, with 100+ colors between them. Our furniture is Amish-made, and our seating is built on solid hard maple seat frames with tempered steel back frames.
- Install or ship. On orders of $1,000 or more, we offer free installation at our shop in Lancaster, including removal and disposal of your old furniture, or free delivery anywhere in the lower 48 states. Our team can also come to campgrounds near the store.
If your floors are staying as they are, we can take the old pieces out and put the new ones in on the same visit. If you're redoing the floor, tell us, and we'll plan the install for after the floor work is done.
Pieces from the installs in this guide
 28″ Lil' Manhattan Wallhugger Recliner
 70″ RV Harrison Hide-a-Bed
 71″ Encore Ultra Sleeper
 67″ Venture Zerowall Universal Pro
What drives the cost of an RV remodel?
We're not putting price ranges in this guide, because every rig and every scope is different. Here's what moves the number, so you can plan and compare quotes:
- What you find in step 2. Hidden water damage or soft floors can change the whole scope before any cosmetic work starts.
- Scope. A paint-and-upholstery refresh is a very different project from a gutted rebuild.
- Your labor or a shop's. Paint and flooring are common DIY projects; structural repair is where a repair shop earns its keep.
- Furniture choices. Size, how many seats recline, manual or electric controls, options like head tilt, lay flat or USB charging, and the upholstery type all change the price of a piece.
- Getting it in. Whether installation and old-furniture removal are included, or extra.
For a quote on furniture for your floor plan, send us your measurements or call 717-400-5651.
Frequently asked questions
How do you remodel a camper?
In order: inspect it and fix any leaks or water damage first, take out the furniture that's being replaced or is in the way, do floors, walls, paint and lighting, then measure the finished space and bring the new furniture in last. That order keeps you from redoing work and keeps new upholstery clean.
Can you remodel an RV interior yourself?
Yes. Paint, window treatments and flooring are common DIY projects, and there are good guides for each (see our sources). Structural or water damage repair is where a shop's tools and experience matter most. For furniture, the hard parts are measuring right, getting old pieces out the door and securing the new ones.
Do RV couches have seat belts?
In motorhomes, some do. They can be tucked behind or under the cushions, and a belted sofa counts as a travel seat. Check yours before you remove it and ask your RV maker how a change affects your travel seating.
How do you remove an RV couch?
RV sofas are typically held down with a few bolts or screws, and some have to be partly taken apart (arms, backs or the front panel) to fit through the door. If we install your new furniture at our shop, removing and disposing of the old pieces is included.
Can RV furniture be reupholstered?
Yes, upholstery shops can recover RV seats and cushions. It can be a bigger job than people expect on sofas and recliners with mechanisms, and new upholstery won't fix a worn frame or recline. Compare both options before you decide.
Is renovating an RV worth it?
It depends on the rig's condition and how much you use it. A sound RV with dated finishes and uncomfortable seating can feel like a different rig after a remodel. One with hidden water damage needs that fixed first, and it's worth knowing the scope before you spend on finishes.
Sources
- RV Inspiration, "How to Remodel an RV: DIY Guide for RV Owners" (inspection, roof leaks and water damage first; paint cure time before furniture)
- OCRV Center, "Water Damage Triage: Find the Path Before Fixing Anything" (repair order; finishes last)
- Good Sam Camping Blog, "How to Install New Floors in Your RV" (factory floors under furniture; removing furniture; flooring over linoleum)
- MountainModernLife, "How to Remove the Sofa From Your RV" (sofa out before flooring; partial disassembly to fit the door)
- The RV Forum, "Replacing sleeper sofa" (seat belts behind sofas; furniture coming out the door; reupholstering)
- Jayco Owners Forum, "Furniture Weight Limits for a Slide Out" (owner's manual caution on slide-out weight)
- Heartland Owners Forum, "For those not happy with their Couch and/or Recliners" (factory guidance on furniture weight in a slide)
- iRV2 Forums, "Replacing an L-Shaped RV Couch With Two Recliners" (comfort and TV viewing)
- Winnebago, "RV Slideout Best Practices & Maintenance" (keep the floor clear before retracting)
- Open Road Interiors: RV Furniture That Lasts (How It Works, FAQ and hours), Shipping, Upholstery and Before and After pages (November 2026)
- Product pages on openroadinteriors.com (as listed in November 2026)
How we made this guide: we compared the order of work in the remodel guides and the repair shop guide above, and read RV owner forum threads for the problems owners run into when they replace furniture. Sizes, options and upholstery come from our own product pages, the photos are our customers' rigs from our Before and After page, and the showroom story and install details come from our own team's experience.
Visit us
Come sit on it before you buy
Visit our Lancaster, PA showroom at 2460 Lincoln Highway, Suite 504. Open Monday to Saturday, 10 to 5, no appointment needed.